Deploy Your Hugo + Tailwind v4 Website to Cloudflare Pages Automatically with GitHub Actions
This guide shows how to automatically deploy a Hugo + Tailwind CSS site to Cloudflare Pages every time you push code to your GitHub repository. It’s written for beginners — no advanced DevOps knowledge needed.
1. Why Cloudflare Pages
Cloudflare Pages is a free, fast, and globally distributed static site hosting service. Reasons it fits Hugo perfectly:
- Edge CDN: Your site is cached worldwide by default.
- Zero config HTTPS: Free SSL certificates automatically.
- Continuous Deployment: Every
git pushcan trigger an instant rebuild. - Fast builds: Uses Cloudflare’s global build infrastructure.
- Free plan generous: Great for small to mid projects.
Compared to:
- Vercel: Best for dynamic Next.js sites, but slower cold starts for static ones.
- Netlify: Also strong, but slower free builds and smaller bandwidth limit.
- Cloudflare Pages: Best for Hugo and JAMstack static sites — minimal setup, high speed.
2. Why Hugo
Hugo is the fastest static site generator (SSG). Written in Go, it can build hundreds of pages in seconds.
Advantages over other SSGs:
| Feature | Hugo | Astro | Jekyll |
|---|---|---|---|
| Build speed | ⚡ Very fast (Go) | Moderate (Node) | Slow (Ruby) |
| Setup complexity | Simple | Moderate | Complex |
| Plugin ecosystem | Large | Growing | Mature but older |
| Markdown performance | Native | JS render | Slower |
| Ideal for | Blogs, docs | Components + partial hydration | Simple blogs |
Conclusion: Hugo is best for blogs, docs, and content-driven sites needing speed + simplicity.
3. Why GitHub Actions
GitHub Actions automates tasks such as testing, building, and deploying. It connects directly with your repository, so every push can trigger an action — in this case, automatic deploy to Cloudflare Pages.
4. Full GitHub Actions Workflow
Create this file in your repo:
.github/workflows/deploy.yml
name: Deploy Hugo + Tailwind v4

on:
  push:
    branches:
      - main

jobs:
  build-and-deploy:
    runs-on: ubuntu-latest

    steps:
      - name: Checkout repository
        uses: actions/checkout@v4

      - name: Setup Hugo extended
        uses: peaceiris/actions-hugo@v3
        with:
          hugo-version: 'latest'
          extended: true

      - name: Setup Node.js
        uses: actions/setup-node@v3
        with:
          node-version: 20

      - name: Cache Node.js modules
        uses: actions/cache@v3
        with:
          path: |
            ~/.npm
            node_modules
          key: ${{ runner.os }}-node-${{ hashFiles('package-lock.json') }}
          restore-keys: |
            ${{ runner.os }}-node-

      - name: Install dependencies
        run: npm ci

      - name: Hugo build
        run: hugo --gc --minify

      - name: Deploy to Cloudflare Pages
        uses: cloudflare/pages-action@v1
        with:
          apiToken: ${{ secrets.CF_API_TOKEN }}
          accountId: ${{ secrets.CF_ACCOUNT_ID }}
          projectName: olimiah
          directory: './public'
5. Step-by-Step Setup
Step 1: Create your Hugo project
hugo new site mysite
cd mysite
Add a theme or your custom layouts.
Step 2: Install Tailwind CSS
Follow the Tailwind CSS Hugo setup guide.
Ensure your package.json includes Tailwind and build scripts.
Step 3: Push to GitHub
Create a repository and push your code:
git init
git add .
git commit -m "Initial commit"
git branch -M main
git remote add origin https://github.com/<yourname>/<repo>.git
git push -u origin main
Step 4: Configure Cloudflare Pages
Go to Cloudflare Dashboard → Pages → Create a Project
Choose Connect to GitHub
Select your repo but stop after selecting — we’ll use GitHub Actions instead of Cloudflare’s built-in deployer.
Note down:
- Account ID
- Project name
- API Token (with
Cloudflare Pagespermissions)
Step 5: Add Secrets to GitHub
Go to your GitHub repo → Settings → Secrets → Actions → New repository secret
Add:
CF_API_TOKEN→ your Cloudflare API tokenCF_ACCOUNT_ID→ your account ID
These values are referenced in the workflow file.
Step 6: Commit and Push
Once .github/workflows/deploy.yml is committed to your repo:
git add .github/workflows/deploy.yml
git commit -m "Add deploy workflow"
git push
GitHub will automatically:
- Build your Hugo site
- Generate Tailwind CSS
- Deploy to Cloudflare Pages
6. Verify Deployment
Check the Actions tab in GitHub → open your workflow run → confirm success. Then open your Cloudflare Pages project dashboard. You’ll see a new deployment linked to that Git push.
7. Summary
Workflow logic:
| Step | Task |
|---|---|
| 1 | Checkout repository |
| 2 | Install Hugo and Node.js |
| 3 | Cache dependencies |
| 4 | Build with Hugo + Tailwind |
| 5 | Deploy public folder to Cloudflare Pages |
Final Thoughts
- Cloudflare Pages = fastest static hosting for global delivery.
- Hugo = fastest static generator for Markdown content.
- GitHub Actions = free automation for deployment.
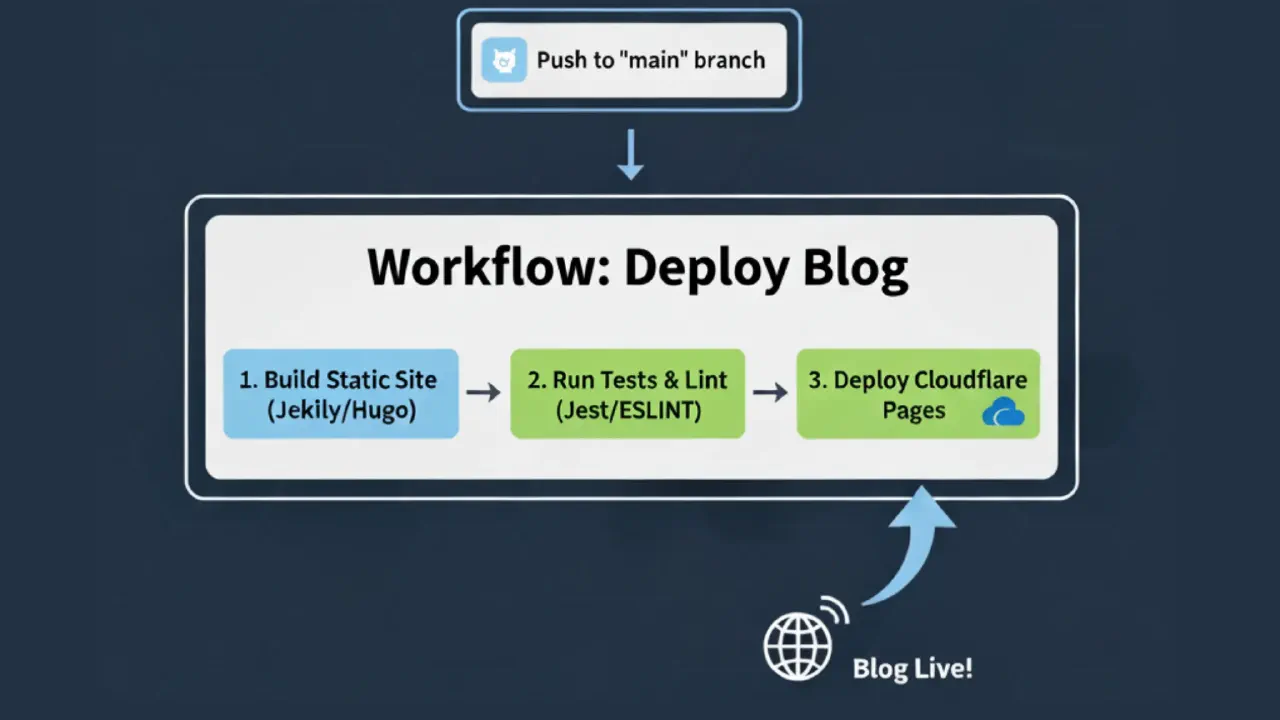
Together they form a perfect JAMstack pipeline:
Push → Build → Deploy → Live globally in seconds.